Notice: Function _load_textdomain_just_in_time was called incorrectly. Translation loading for the wordpress-seo domain was triggered too early. This is usually an indicator for some code in the plugin or theme running too early. Translations should be loaded at the init action or later. Please see Debugging in WordPress for more information. (This message was added in version 6.7.0.) in /home/xs0h25qlchu7/public_html/withereddewlap.com/wp-includes/functions.php on line 6114 Brewing Archives - Withered DewlapSkip to content
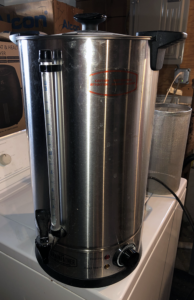
Around the same time that I purchased the Grainfather, I purchased a conical fermenter from MoreBeer.
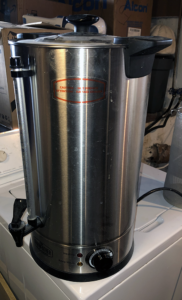
MoreBeer Conical Fermenter
I’m used to fermenting beer in glass carboys or specially designed plastic things.
For a long time I used a digital temperature controller from Johnson Controls. It had a probe that you’d stick down a thermowell via a specially designed bung. I’d wrap the fermenter in a heated jacket, set my hot and cold range in the temperature controller, and that’d be the end of it.
While that setup isn’t the end of the world, it was not ideal. So, finally I broke down and bought a fermenter.
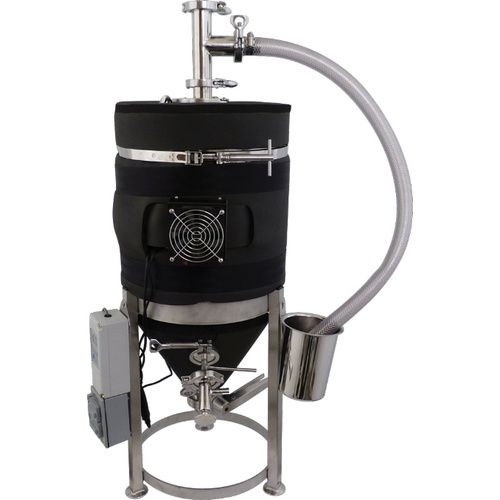
I purchased the 7.5 gallon fermenter, as I brew 5 gallon batches (or so). The unit came with a power strip, a power supply, a Ranco Controller for temperature, built-in heating, and a fan for cooling.
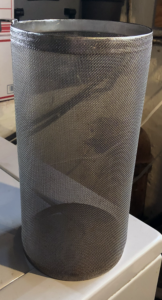
The fermenter uses a Blow Off Tube that drops into a bucket that attaches to the leg. A Blow Off Assembly and Thermowell. An insulating jacket and stainless steel stand. A Slide Racking Arm and a Bottom Dump Valve. And all the Tri-Clamps and gaskets you’ll need to put it together.
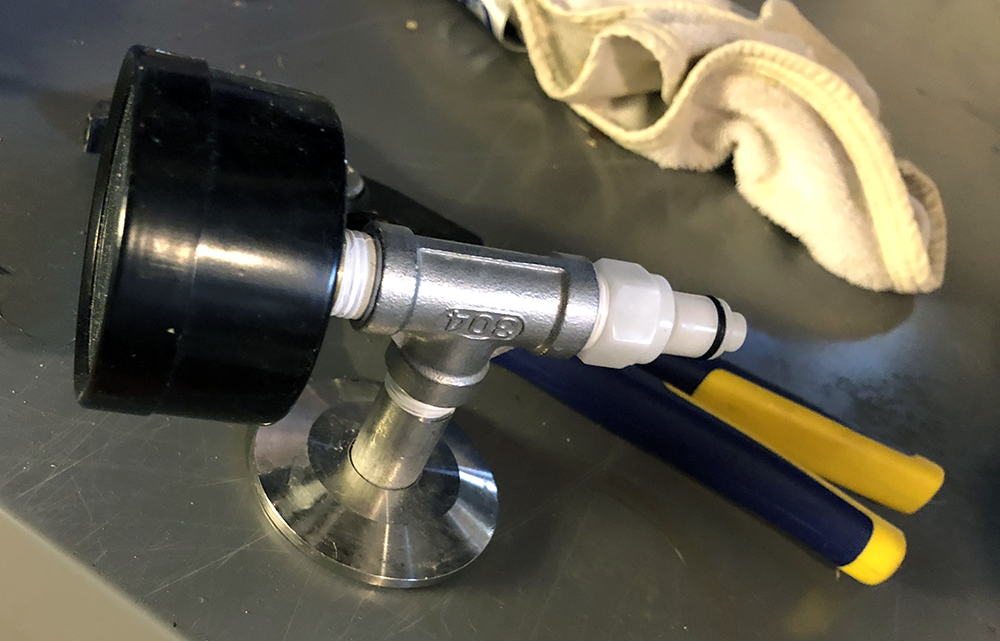
Gas Manifold, w/ CO2 quick connect.
I’m not a biochemist so I’m not taking yeast samples for culturing. However, I do use the Racking Arm to move the fermented beer directly into my kegs.
There’s a handy gas manifold that connects by Tri-Clamp to the top of the Blow Off Assembly (after you remove the Thermowell). I connect the gas manifold to my CO2 and push the beer out of the Racking Arm into my corny keg. Make sure you disconnect the Blow Off tube before you push in the CO2, else the Blow Off tube will suck like a straw right out of the bucket. (It was Star San water in the bucket…)
Now, when I’m at the end of the brew session, I use the Grainfather to pump the wort out. It goes through the Wort Chiller, the line, my Thrumometer, and right into the top of the Fermenter (before I attach the Blow Off Assembly). I oxygenate the wort with my O2 stone, pitch the yeast, and seal it all up.
The beer never hits the air again until it’s in a glass, and the world is a wonderful place.
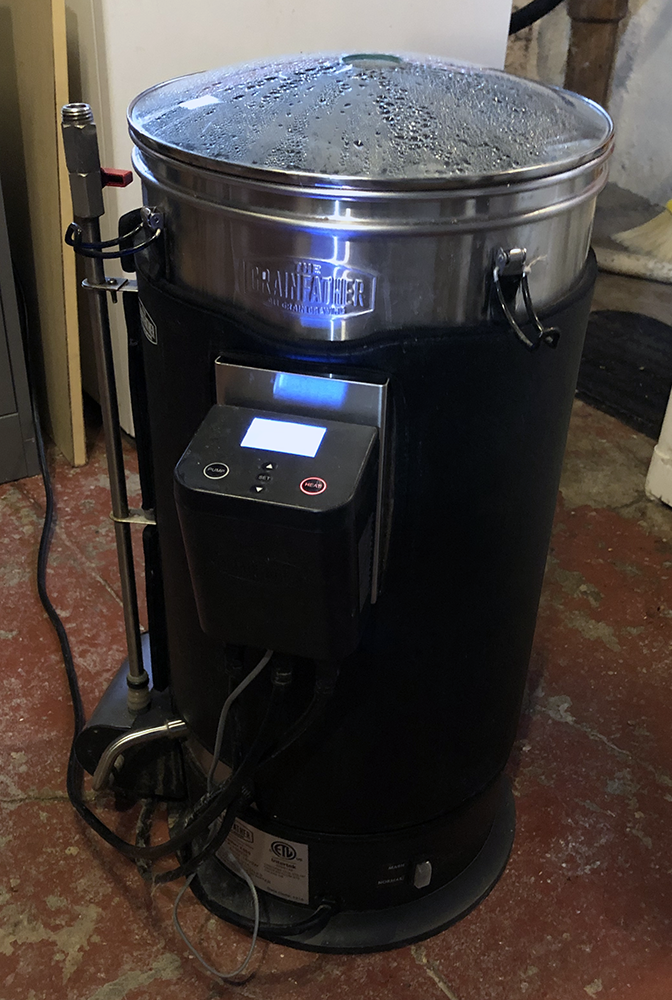
In 2017 I purchased a Grainfather in an effort to move beyond the earlier approaches I’ve used to brewing, i.e. the orange, 10-gallon Rubbermaid cooler (mash tun) with the copper manifold, spigot, etc.
While that mash tun works, and I appreciated the brews that I made on it, it really only worked for single infusion mashes, or mashes that included one or more decoction steps.
So, in late-2016, early-2017 I started looking for a system that I could direct fire (or heat). I also wanted a system that would re-circulate when mashing. Obviously, I also wanted something that could be temperature controlled, preferably by electronic (and remote) means.
At the time, I recall narrowing my options down to either the Grainfather or the Braumeister. Alternatives were expensive: for instance, a three-tiered brew systems. I felt intuitively that my wife would murder me if I spent that much on one system. Some of the options that are available today were not available when I was looking in 2016/2017.
Features
I’m not going to go into all-encompassing detail on features. There are plenty of youtube videos, as well as the Grainfather company site, to which to refer for specifics. What I’ll discuss is what I have found to be most enjoyable/useful about the system.
Recirculation
Yes, I know that recirculating infusion mash systems (rims) aren’t new, but they are to me. The system has a magnetic drive pump (6 watt, 1800 RPM). It isn’t the strongest pump in the world, but it’s better than dealing with gravity, tubing, and 212 degree wort.
Pump filter
There’s a filter in-between the interior of the Grainfather and the pump. This vastly improves the your chances for not getting a stuck sparge, as when your grain bed is sitting on your slitted manifold.
However, the filter sticks out into the Grainfather like a wart off someone’s chin, and at least one time I’ve hit it with my mash paddle where it had the effect of a straight razor on said wart. When the filter comes off the pump, you’re screwed: unless you want to stick your arm down inside boiling wort.
I purchased a hop spider, which greatly reduced the likelihood of a stuck sparge. The pump filter has large enough holes that the detritus of pellet hops slips through.
Grainfather connect
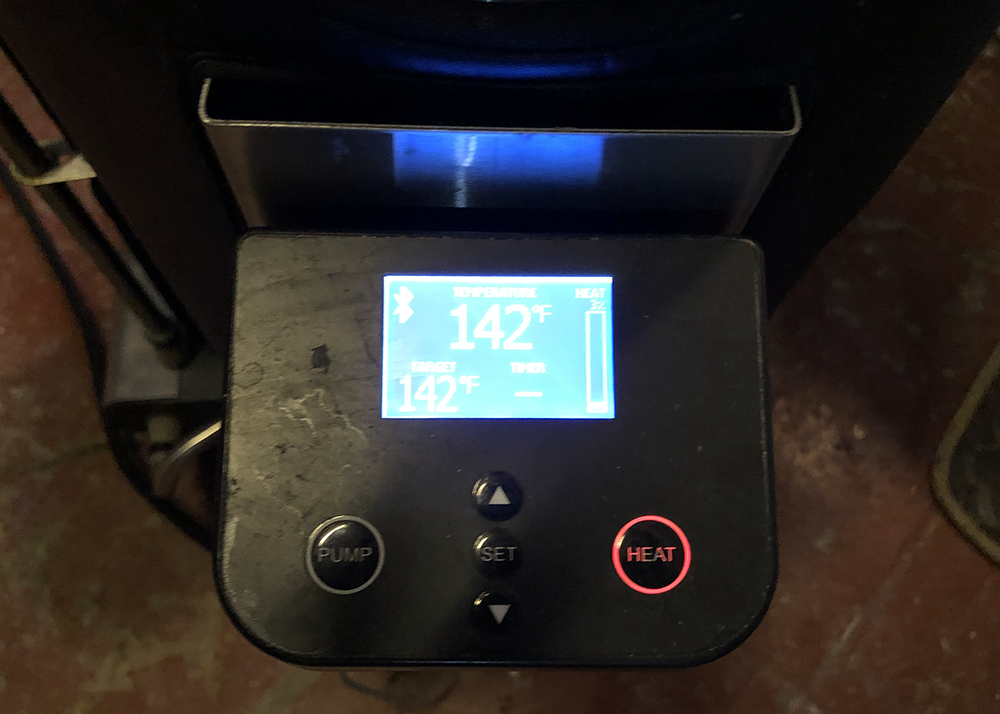
Grainfather connect allows for a bluetooth connection from your phone to the controller, so you can control all aspects of the mash timing, from your phone.
Often times I don’t have the full amount of time required to have a brew session. Grainfather connect allows me to sit with my family and still monitor a step mash, for instance.
There’s a Grainfather brewing app that allows you to put in your recipes and execute them from your phone, but the app is buggy and you’re better off setting everything up through their website and then running it from your phone.
You can also program the unit to pre-heat in advance (assuming you have the water in it and ready to go), and pre-set mash steps.
Grain basket
The design of the Grainfather in this regard is very good. When you’ve finished mashing, you simply lift the grain basket out and let the lauter begin. The “feet” on the grain basket rest on the interior brackets. You can extend the grain basket to 19.8 pounds. Extending is something I should have done during my most recent brew (to be discussed later). The limit is on mashing in the grainfather (hint: 21 pounds of grain doesn’t work very well).
Counterflow wort chiller
The wort chiller is great. As I’ve posted before, I’ve got the Blichmann Therminator which is a fantastic plate chiller. While the Therminator works better, in my opinion, than the counterflow chiller, you can connect the Grainfather counterflow chiller to the pump, which makes the difference. I’ve also connected my Blichmann Thrumometer to the brew-line-out of the Grainfather chiller, which allows for inline temperature measurements,. The Grainfather chiller works extremely well with only a slight influx of cold water. I empty the hot-line from the chiller into my washing machine so all excess water serves two purposes.
Quirks
There are some clunky aspects of the Grainfather (besides those I mention above):
If you want to perform a decoction mash while using the Grainfather, you virtually cannot use the top mesh screen. Absent the top mesh screen, you risk grain spilling into the main tank, which you’ll use later for boiling.
The top recirculation arm is very tight against the glass lid. Should you need to remove the lid, you’ll need to take the recirculation arm off to take off the lid. This ensures that hot wort will run down the side of the unit, onto the pump housing, and the floor). The unit can also be touchy in terms of scorching on the bottom.
If you fail to remove scorch marks from the bottom of the Grainfather, you’ll have some problems. The scorching will build and trigger an emergency shutoff of the Grainfather as the heating element is on the bottom. Also on the bottom is the reset button. To reset the unit, you’ll have to lift it up. That’s a problem if the unit is filled with a mash or wort. This also goes for any additions you make which could scorch (extract, honey, etc.)
Final Thoughts
Despite my pickiness about a few things with the Grainfather, it’s a positive development in my brewing experience. That I can use one piece of equipment to both mash and boil is great in itself.
The bluetooth remote control, the ease of step mashing, the pump controlled re-circulation and wort chilling, and the ease by which you can move wort into the fermenter makes the brew day nearly effortless–at least in comparison with the old Rubbermaid mash tun, and 8-gallon brew pot.
Cleaning the unit is fairly easy as well. The insulating jacket pulls off, the Grainfather connect unit disconnects, and the recirculation features of the pump can be used to clean the unit and the wort chiller.
Right now, for instance, to clean off some scorching from last night’s brew session, I’ve got the Grainfather set to 140 degrees and some PBW mixed into two gallons of water. I can control the temperature of the water via my phone and can later re-circulate the clean water through the unit and the wort chiller while sitting on my couch.
Yes, it’s that time of year already. I christened my 5.5 gallon batch with a 1.8L starter of German Lager yeast, WPL830, yesterday at 5:00pm.
Ingredient
Amount
Munich Malt
5 lb
Pilsner Malt
5 lb
Vienna Malt
3 lb
Hallertauer
1.5 ounce (60)
Hallertauer
.5 ounce (20)
WLP830 (German Lager)
1.8 Litre
Everything went very smoothly. I treated my water with salts to boost the water profile (tsp epsom salt, tsp calcium chloride, ph stabilizer). Mashed at 156 for 50 minutes. Got 2.8 gallons on the first run at 16 brix @ 140 degrees for a 1.078. Sort of confirmed by a hydrometer reading of 1.054 @ 140 degrees = 1.070 approximately. Second run at 1.25 gallons with 10.5 brix @ 142 degrees for 1.043, hydrometer 1.030 @ 142 for 1.046. Third run at 1.5 gallons at 6.5 brix @ 148 degrees for 1.020. And a fourth run of 1.3 gallons which was nearly water and I only used about a quart. The pre-boil gravity was 1.056. I boiled for one hour. Cooled the wort to 63 degrees (which is the temperature of my basement where the starter had been sitting) and pitched. OG was at 1.050 which I’ll discuss in a minute. Hooked up to my handy-dandy Johnson control unit/heater set up and threw the fermenter in the refrigerator at 53 degrees. Now I’ll just wait for nature to take it’s course.
Per the above, I continue to have issues, for some inexplicable reason, with my gravities at OG time. I cannot understand how a wort with a pre-boil gravity of 1.056 can boil for one hour and come out at 1.050. That seems impossible. Water should evaporate and sugar should not. I confirmed with the refractometer which showed even lower. This is a source of endless confusion for me. I can understand if one over-collects on the sparge and then has too much water in the kettle, but I measured the pre-boil gravity… Regardless, I may have to take another tack and do some calculations on pre-boil gravity, evaporation rates, and so on to see if I can estimate the OG. But the fact that the tools reported something else is highly upsetting. In the end, I guess, it’s all about what the beer tastes like. But still.
Just sent a bottle of tap to Ward Laboratories in Kearney, Nebraska. The water report is as follows:
pH
7.5
Total Dissolved Solids (TDS) Est ppm
170
Electrical Conductivity, mmho/cm
0.28
Cations/Anions, me/L
3.0 / 2.7
ppm
Sodium, Na
10
Potassium, K
1
Calcium, Ca
35
Magnesium, Mg
10
Total Hardness, CaCO3
129
Nitrate, NO3-N
0.3 (Safe)
Sulfate, SO4-S
12
Chloride, Cl
13
Carbonate, CO3
< 1
Bicarbonate, HCO3
97
Total Alkalinity, CaCO3
80
Flouride, F
1.14
Total Iron, Fe
< 0.01
I’ve heard that the profile for Cleveland water differs in winter from summer. So, I may have to send off for another report later this year.
My next brew is going to be an Oktoberfest/Marzen. So, I will see what it takes to create a water profile that aligns with one from German regions based on this report. Found a pretty interesting article on Homebrew Water Treatment at The Mad Fermentationist.
Spent part of Monday brewing outdoors. The first time I’ve done that. I purchased a Blichmann floor burner from Grape and Granary a few years back and just hadn’t gotten around to using it; well, now I can say that I have.
The burner is fantastic and connects to a propane tank. It puts out 72,000 BTU’s per hour which translates to a whole lot of heat for fast boils. I am used to brewing in my kitchen where I use a standard gas range. The time to boil was a great delay in the brew day for me. After lautering and sparging and collecting the wort into the boil kettle, the time from that 160 or so degrees to 212 was too much. It could take nearly an hour just to get to boil. I didn’t time things out specifically, but I would swear that the Blichmann was heating water at around 10 degrees every five minutes, maybe even faster. So in approximately twenty to twenty-five minute it was boiling. It happened so fast, in fact, that I had my first boil over in years, even with fermcap. But it was outdoors, so only the ants were pissed (and me later, when I had to scrub the pot).
Another upshot with outdoor brewing is that I just ran the hose to the kettle and used the hose to connect to the Blichmann plate chiller that I have. The excess water that comes in chilling the wort went straight into the garden beds for the very thirsty pumpkins, cucumbers, and peppers. The main drawback was that the water temperature was very difficult to get down, with the nearly 100 degree heat, so I could only chill the wort to 77 degrees, which is a bit high for pitching (but I did it anyway).
I brewed a Brown Ale with lots of Cascade and Nugget hops. The Nugget came straight from my backyard, circa 2011 (vacuum sealed in the freezer). It was a low gravity extract beer which I am using as a yeast starter (essentially) for an all-grain Imperial Red (Nosferatu clone) that I’ll brew in a week or two.
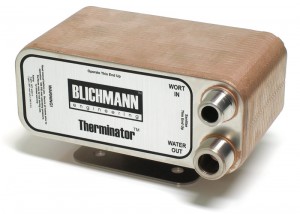
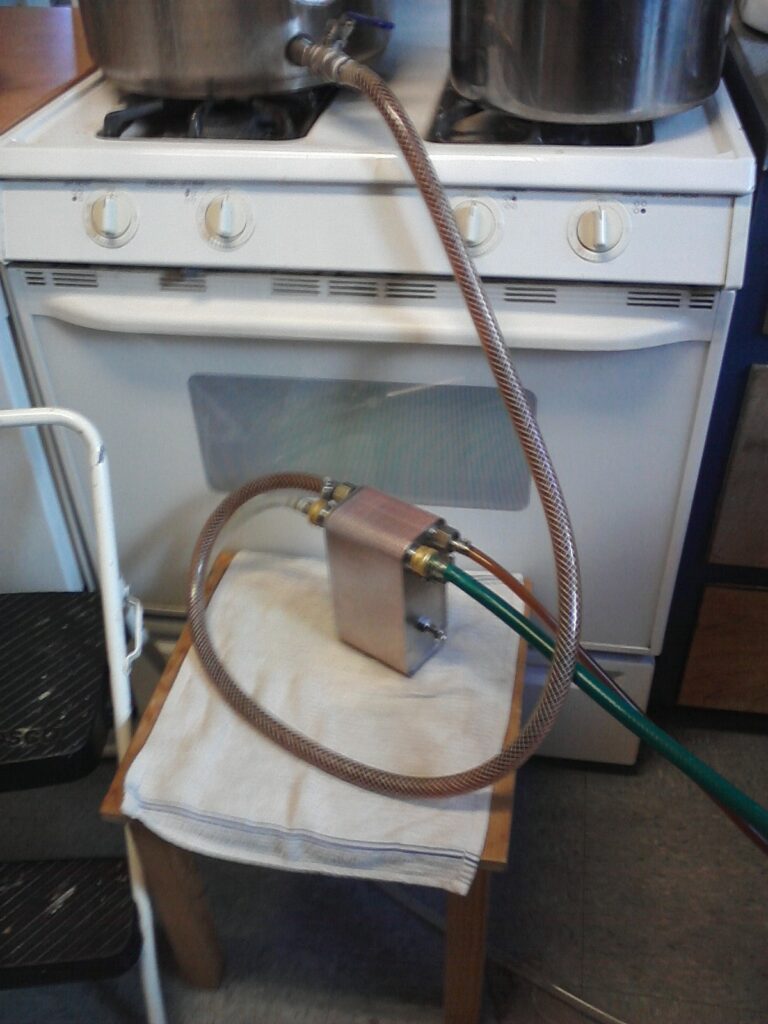
The next piece of equipment that I’d like to type about is my Blichmann Therminator plate chiller and accompanying pieces of equipment.
I have to say, first, from a purely emotive perspective: I love the Therminator. I used a more traditional wort chiller for several years: the old copper coil submerged in the brew kettle. I didn’t like the coil because: 1) it took forever to cool the wort (and wasted water); 2) if I didn’t tighten it properly, water leaked into the wort; 3) you had to submerge it in boiling wort to sanitize it; 4) it was a pain in the ass to deal with the thing sticking out of the brew kettle and it interfered with the whirlpooling of sediment.
I also tried other approaches to cooling the wort. Often you’ll read suggestions for an ice water bath, etc., which to my mind takes too damn long if you’re truly attempting to get a cold break. As I said, I have tried other approaches, which culminates in my telling yet another embarrassing story of my brew past. There was this one time… Seriously, it was in the middle of winter, a foot of snow, near zero temperatures outside. I thought: why not? Took the old brew kettle, full as it was, outside and plunked it down in a snow bank. I went inside, cleaned up, and plopped down with a frosty pint and started watching a movie with my wife.
When out on the lawn there arose such a clatter I sprang from the couch to see what was the matter. Away to the window I flew like a flash Tore open the blinds and threw up the sash.
I’ll spare you the bit about the moon, for all was blackness to my eyes at that point: five gallons of future joy stained the snow like blood after a winter battle. Yes, I learned that night that snow melts unevenly–or that heat dissipates unevenly–or that something does something unevenly. Outside I picked-up the now empty brew kettle from off its side, along with the lid, and trudged back into the house utterly forlorn. For a month I had to watch my very young daughter point at the black ice and listen to her say, “there’s daddy’s beer.”
So, plate chillers are good.
Features
The other that I’ve seen (on Morebeer) is the Shirron plate chiller, which is about half the price of the Therminator. I’ve not tested or used them all, so I can’t speak to the best features or disappointments of the class of products–Blichmann does have test results on their site, but of course: It’s their site. I picked it up the Therminator from the grapeandgranary in January, 2009, for $199.95. At the same time I also picked up the Blichmann Thrumometer.
According to Blichmann, the Therminator is:
Identical to those used by commercial breweries
Can chill 10 gallons in 5 minutes
Is Ultra compact
Easy to clean and sanitize
Uses garden hose thread connections
Saves water
Comes with a heavy duty mounting bracket
Use
There are other features listed on the site. The Therminator is pretty straightforward: you have a connector labeled WORT IN and WATER OUT. The connector sizes are different for each channel–so, the WORT only connects to WORT, and WATER to WATER. There is a mounting plate that is attached by bolts on the back. I don’t think I’ve ever chilled 5 gallons of beer in 5 minutes, but certainly less than 10 minutes. However, I’ve not tested the throughput of the flow of water that I’m using. Blichmann’s site states that it uses 5 gallons per minute. It has to be pretty close to that, though, as I’ve filled up two 7-gallon fermenting bucket 2 times (4 times/28 gallons) with the water that goes through the Therminator. I dump the water in the washing machine; in the summer sometimes I dump the water in the garden. In terms of compactness, it does not take up much space and it is easily placed in a fermenting bucket filled with sanitizer or, as the Blichmann site says, in a pot to boil. The thread connectors are quite important as, once you have the appropriate connectors for your hoses, everything fits together easily. I had to go to a hardware store and pick up an adapter for the kitchen faucet and I created my own WORT IN and WORT OUT hoses by picking up the appropriate threaded connector accessory kit. The ease of this made me feel pretty stupid after I had already ordered the Backflush hose, which is simply another piece of hose with the garden thread connector on one side and the quick connector on the other.
In use, I connect the barb valve in the Brew Kettle to and ID hose with the quick connect on the opposite end. This connects to the WORT IN connector on the Therminator. I connect the other ID line with the quick connect on it to the WORT OUT side. This hose has the Thrumometer in the middle to gauge the flow temperature of the wort as it comes out of the Therminator. The ID line flows directly into the fermenting bucket. I connect garden hose connector one to the faucet and the opposite end to the WATER IN on the Therminator; likewise, garden hose connector number two to the WATER OUT and the opposite end is just an open ID line into a 7 gallon bucket for collecting the water. Often there is some adjusting of the temperature of the water coming out of the faucet because, believe it or not, I’ve actually had instances where the wort coming out of the Therminator is too cold for an ale yeast starter.
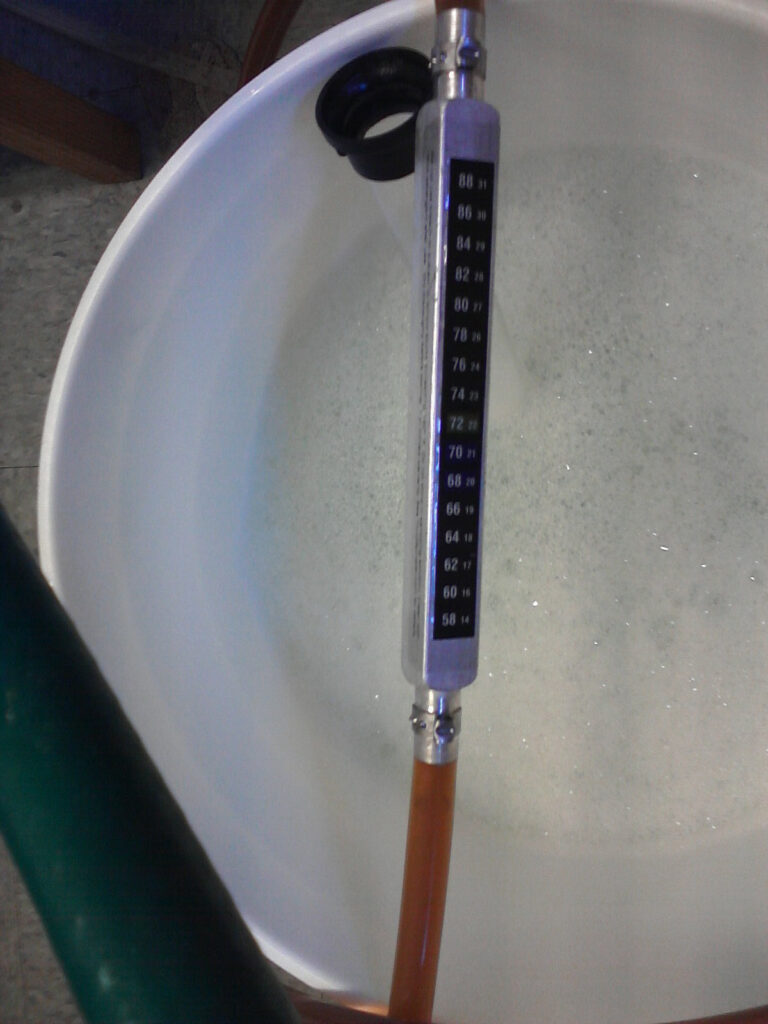
Thrumometer
The Thrumometer is an instrumental tool, I think, for monitoring the temperature of the water coming out of the process. I always have a digital thermometer in the wort to ensure that the reading is on target and it generally is; though sometimes there will be variance in how hot the temperature of the wort is when it initially comes out and once the plate chilller has been active for a bit. The Thrumometer is an inline measure and it’s pretty passive, but it works. The tool itself measures temperatures between 88 degrees and 58 degrees. It is made of aluminum and has a black temperature gauge that changes color as a temperature is reached: the color moves between black, to dark blue to bright green when the constant temperature of the wort settles.
Backflush Hose
The Backflush hose is important. After I’ve aerated the wort and pitched the yeast and the beer is safely and happily snugged away, I take off the WATER OUT hose from the previous process and connect the garden hose connector of the Backflush to it. I take off the line from the barb valve to the WORT IN as well, and then connect the quick connector of the Backflush hose to the WORT IN of the Therminator. In essence, the Backflush hose is connecting the WATER side of the Therminator to the WORT side. I heat up the water from the faucet and let it flush out the Therminator, which is generally pretty full of hop sludge and other break material. I then move the WORT connector to the WORT OUT and repeat the process, flushing in reverse. I’ll do this a couple of times to clear the Therminator and then I’ll dunk it in a sanitizing bucket while I clean up.
Conclusion
All-in-all I’m pretty pleased with the Therminator plate chiller, and while I can’t speak comparatively to other plate chillers in how they compare, the Therminator is a big step up from the traditional coil wort chillers and definitely beats ice bathes and snow banks.
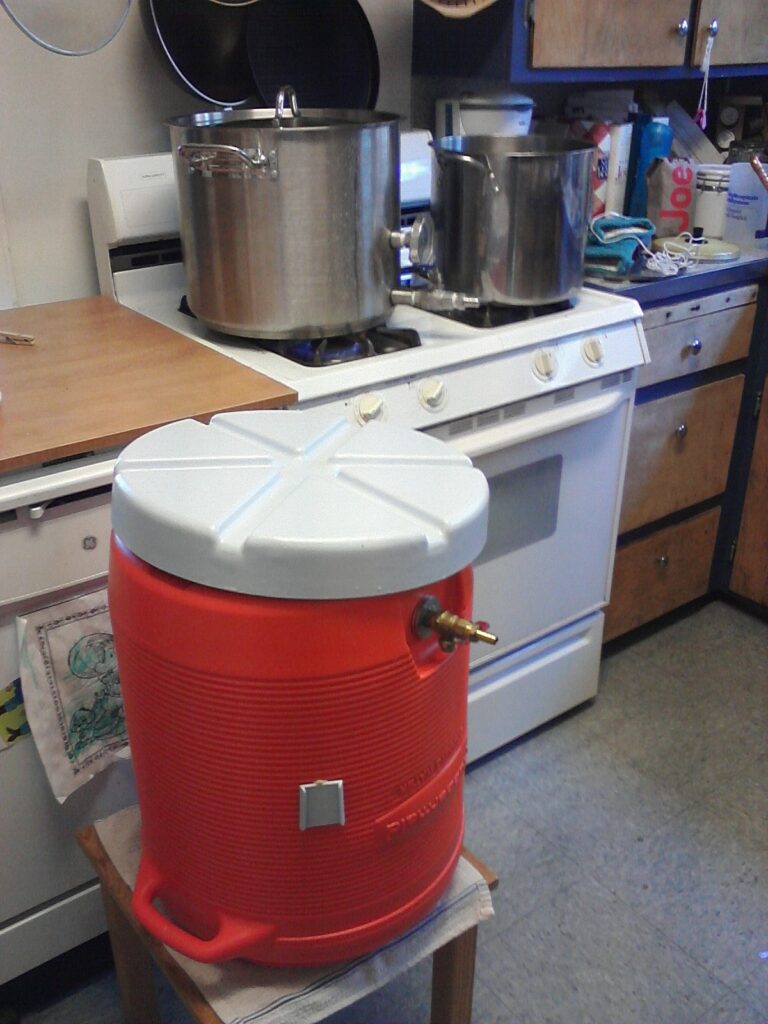
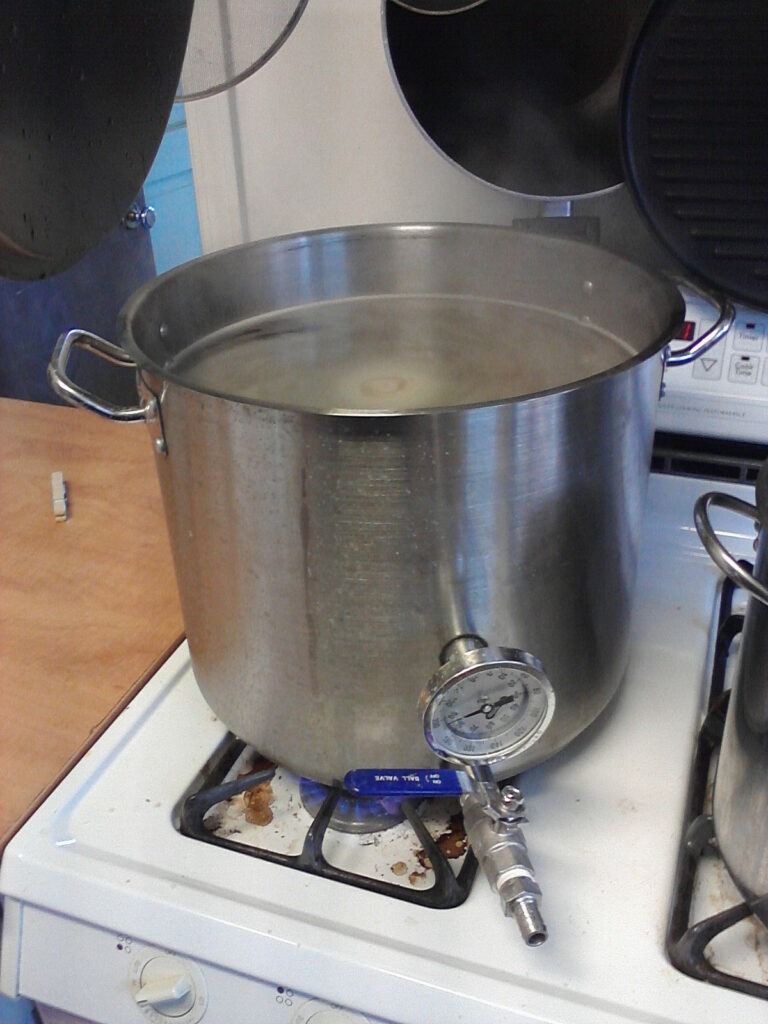
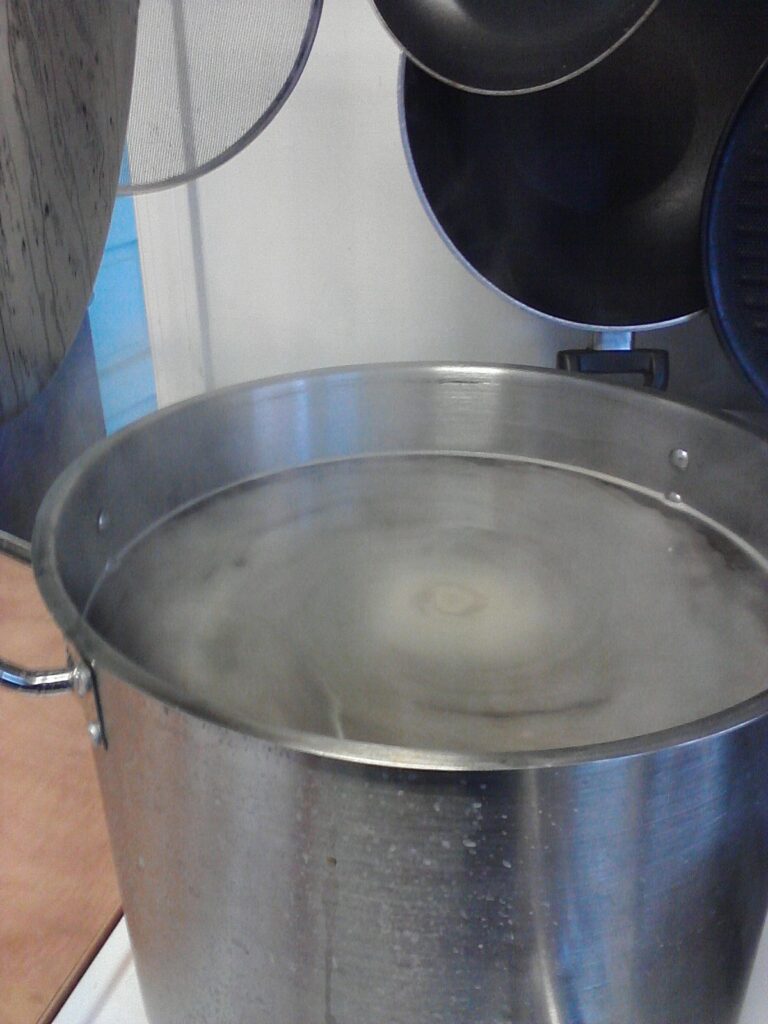
Thought I’d throw up a few of the shots from my most recent brew session–the Arrogant Bastard clone.
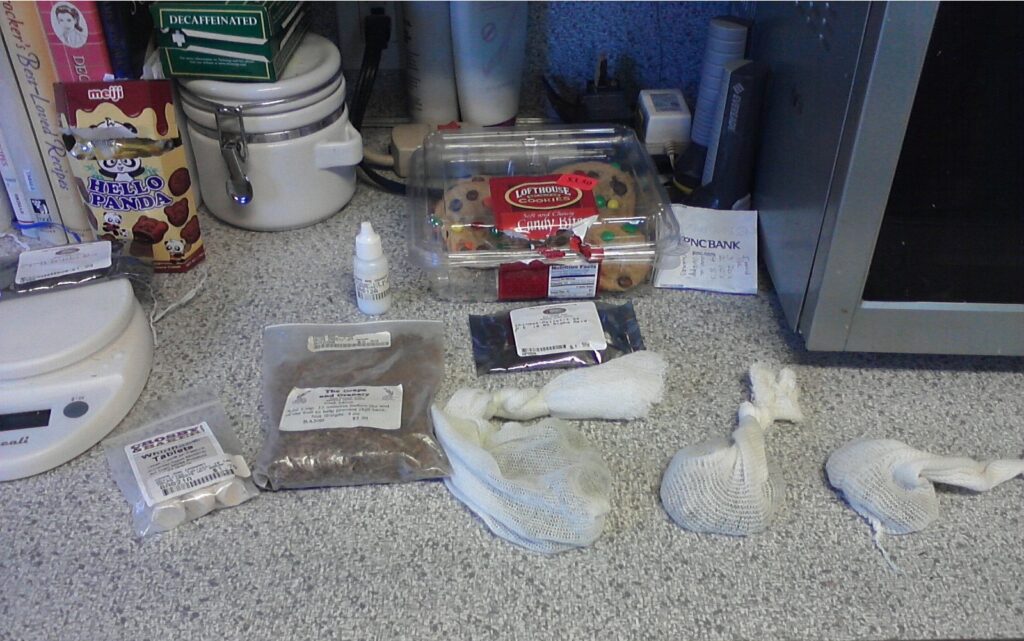
Photo descriptions
The first is the 10-gallon water cooler that I use as my mash/lauter tun. It’s upside down in the picture drying out after I washed it. There’s a couple of shots of the brew in the kettle as it simmers: anticipating the rolling boil to come. I’ve got a shot of the counter top with the Chinook pellet hops in their respective hop socks: the first, on the left is the 90 minute, then 30, then flame out. There’s also a bag of Whirlfloc tablets and Irish Moss. I only used the Whirlfloc. You can also see my digital scale and a small white bottle of Fermcap (anti-foam)–oh, and cookies! I’ve got a shot of my Therminator plate chiller which I’ll talk about soon in another article, as well as a shot of the Thrumometer which allows me to keep tabs on the temperature of the wort after it exits the plate chiller on its way to the fermentation bucket. Good stuff.
Conclusion
The OG of the Arrogant Bastard was 1.084 which is good, but given the recipe I used demonstrates my continued problem of low efficiency in my process. The one sure area of my brewing process on which I want to improve.
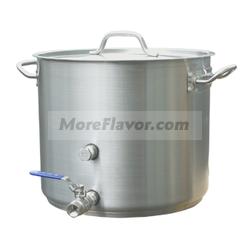
I thought I’d kick off my more serious blog discussions by talking about my equipment; ideally this will accomplish two things: address my own process and force me to inventory everything that is scattered all around.
Thanks to MoreBeer’s order history feature I can state that on January 23, 2008 I purchased my brew kettle. I purchased the Heavy Duty Brew Kettle – With Ball Valve (32 Quart/8 Gallon)– BE308; at the same time I added in the Dial Thermometer (3” Face x 6” Probe)–MT502. The 8 gallon brew kettle has two ports: one for the thermometer and the other for a ball valve, which I also picked up: Stainless – 1/2 in. mpt x 1/2 in. Barb–H618. I’ll put the full equipment list at the bottom for easier reading.
The ball valve obviously makes it easy to get the boiling hot wort out of the kettle and the barb reduces the flow so it can drain into a 1/2” vinyl tube rated for 212 degree temps. Once this hits the wort chiller, which I’ll discuss later, I can quickly get the temps down to pitch temperatures. The thermometer works well and I’ve paired the temperatures it reports against a digital thermometer and they match up. Nice to test analog against digital and get good results! The one thing that’s tricky is you have to have a bit more than three gallons in the kettle in order for the liquid levels to be high enough for the thermometer to register temperatures. And on this note, I’ll also comment that a better design of the kettle would include some internal method of marking liquid measures. As manufactured, there are no gallon markings–markings that are present on smaller stainless pots I have around the house. This forces me to lauter into plastic buckets with spouts to measure what I drain off –and then re-drain the wort into the boil kettle. (All to avoid hot side aeration.) With regard to there being no markings, I have figured out over time that I’ve got about 6.5 gallons in the kettle when the wort level hits the handle bolts on either side.
In October 2009 I picked up a false bottom for the kettle (H111) as I made the move to all-grain and thought I could avoid the construction of a mash/lauter tun. The reality is that the 8-gallon kettle is not suitable for all-grain brewing. The ratios of water to grain that are necessary for most beers make it somewhat perilous and messy to attempt mashing in the kettle. I’m sure that it would work fine for lower gravity or session beers, and I really should try that. Unfortunately (or fortunately) I like to brew big beers–imperials and barley wines, and the grain bill and water ratios just exceed the volume of the kettle. Here I’ll relate and embarrassing tale as well. Early on I thought I could get around this problem by doing two-part mashes and using the first runnings and mix them together for the brew. Of course, the result was that I had two beers with average gravities and mixing them only made one big batch with an average gravity. This demonstrates my mathematical logic at work. The ultimate point, here, being that if you anticipate using the brew kettle for mashing and you think you might make the move to all-grain then you should buy a bigger kettle–probably a 60 quart. If you intend to brew extracts or partials, then the 32 quart kettle should work fine.
Ultimately, the kettle is absolutely solid and I can continue to use it for boils–presuming 5 gallon brews.
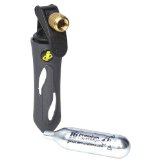
The Cornelius Keg CO2 Charger worked like a charm yesterday and the beer went quickly. I will admit that I was a little disappointed at the rate at which the CO2 cartridges were expended, especially given the cost, at around $2.00 a piece, depending on where you pick them up.
I was in the kitchen enjoying my Marzen when someone came into inform me that my keg wasn’t working. I think it took all of :45 minutes or so for the cartridge to go. I was lucky that when I ordered the adapter kit for the Keg Charger I ordered an extra cartridge, but only one. It didn’t take long for that one to go, too. I was lucky that Mike Piazza was there with his setup, dispensing a spicy and balanced Weizenbock that he brewed, so he could hook it up quickly to mine and gas the keg up.
So, big take-away with the Keg Charger: 1) don’t use them and bring your CO2 tank along; 2) if you do use it, bring plenty of cartridges for your Charger because you’ll need them.


